In my previous posts, I told about sequential photography and how to make it by yourself. Also, I showed my collaboration with Roxy. In this post I would like to tell you how I did it by myself with the help of photocamera and applications like Photoshop and Lightroom.
The first thing I did was work on the composition in the frame. To make a suitable background, I took my sheet and hung it on my closet by attaching the ends of the fabric behind the handles of the closet with my hair bands. I also brought my portable easel, brushes, paints and paint palette. Since I don’t have a tripod, I put a table in front of me then I put a lot of books on it to get the right angle.
My next step was to set up the camera. All the photos you’ll see below were taken by Photocamera Canon EOS 600D. I set the aperture to 5.0 to start with, the ISO to 1600. Since I had a pretty bright natural light source, I didn’t use any extra lighting.
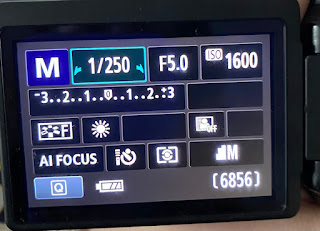 |
| My Settings on the camera |
When all the photos were taken, I deleted everything that didn’t fit my idea. Then I uploaded all the remaining photos to my computer and started processing. Because I didn’t want to paint my sheet, my first job was to get fingerprints all over the photos. To do this, I took a photo in PNG format and uploaded it to Photoshop.
Then I decided to make a brush out of this print, which helped me in the ease of use in the future. In order to make the photo above the brush, I opened ''Edit-Define Brush Preset''. 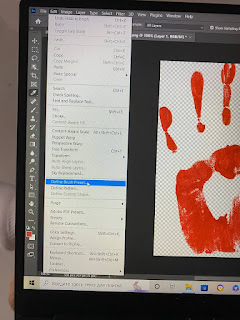 |
Edit-Define Brush Preset
|
 |
| Press ''ok'' |
When I added a new brush, I moved on to the next step, editing this brush. When I added a new brush, I moved on to the next step, editing this brush. I changed the angle of the brush, and I also increased the distance between the prints to 188%.
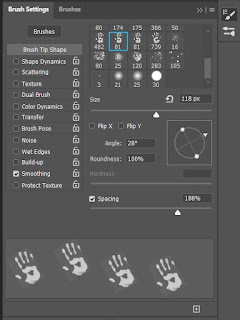 |
| Brush Settings |
When I set up my new brush, I went straight to adding prints to the photograph.
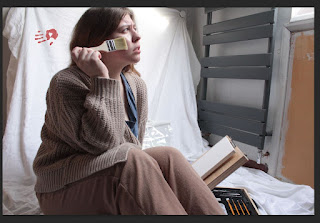 |
| Added fingerprint |
I didn’t like my photos to be colored, so I opened Lightroom and started editing my photos and customizing the color manually.
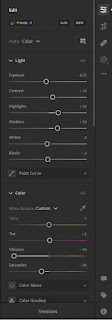 |
| My settings |
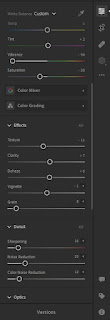 |
| My settings |
When I got the results I saved all the photos to my computer.
My last action for the end result was ''Contact Sheet2'' creating. To do this, I opened Photoshop again. I opened ''File-Automize-Contact Sheet 2''. I uploaded all the ready-made versions of my photos and got what you see below.
I really liked the result. So I’ll share it with you in the next post.


,_Amerikaans_rec,_Bestanddeelnr_922-5100.jpg)


Good attempt at sequential photography and explanation of how you created the series. How did you use Duane's ideas in your own work? How did you find the process?
ReplyDelete