Class Work: Sequential Images
On the previous lesson my partner(Roxy) and I were inspired by discussion about sequential photography and to better unterestand this theme we created sequential photos by ourselves thanks to the camera on our phones. In this post I will analyze in detail each process of creating our work
First of all we made pictures that show the movement. To be more precise, the photos I show at the end illustrates how I tie the cord. I was a model, and my partner on the job was a photographer. In order to achieve good-quality photos we used the auto settings on the 11 iPhone, the ISO was 500 and the wide camera was 26mm f 1.8, 12MP, 3024x4032, 2.3MB.
When the photos were taken Roxy created a separate folder "Group Sequential Images" and shared it with me.
 |
| Shared Folder |
However, when I opened the folder I realized that the photos were made in HEIC format that was not suitable. In order to convert photos to the format I want(JPEG) I opened a website, called ''heictojpg'', which specializes in this. However, it turned out that the site can convert no more than 5 photos at the same time. So I had to upload all the photos by hand.
 |
| Website that helped me in converting heictojpg |
 |
| Images in JPEG format |
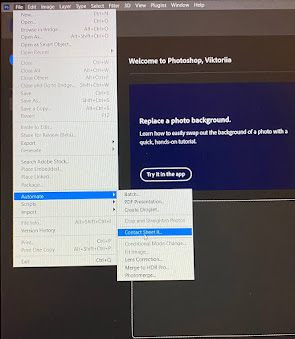
I opened Adobe Photoshop 2023 and clicked "File-Autimate, then I choose option "Contact Sheet II".
 |
| File-Automate-Contact Sheet II |
 |
| Contact Sheet II |
When I performed all the actions described above, I got the end result in the form of sequential photos.

,_Amerikaans_rec,_Bestanddeelnr_922-5100.jpg)


Comments
Post a Comment